Building a Customizable Calendar UI in Flutter: A Beginner's Journey to Mastery

In this blog post, I'll share my experience of building a calendar UI in Flutter that my boss challenged me to create. I'll discuss the steps I took to enhance and customize the screen to meet the project requirements. So, if you're interested in learning how to build a calendar UI in Flutter, keep reading!
We were faced with the challenge of building a simple calendar screen and exploring various packages to make the task faster. While there were several good packages available at the pub. dev such as Syncfusion and Table Calendar, we ultimately decided to go with the Syncfusion Flutter calendar package due to its appealing description. However, the package was not free, and this presented an opportunity for me to rise to the challenge and create a custom calendar from scratch.
Code Walkthrough
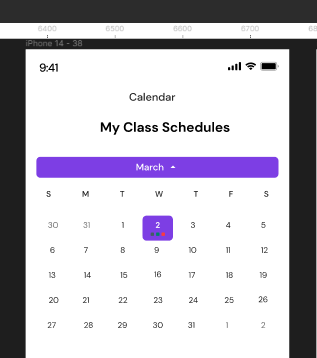
Looking at this screen, you can see that it consists of several elements that are arranged in a specific layout. To recreate this screen, you would need to use a Column widget that contains two Text widgets for displaying the month and year, a PopupMenuButton for selecting the calendar view, and a TableRow widget that displays the calendar grid. These elements work together to create a visually appealing and functional calendar screen that users can interact with.
The first step we create the Text widget, and it was created as this:
Scaffold(
body: Padding(
padding: const EdgeInsets.all(16.0),
child: Column(
// mainAxisAlignment: MainAxisAlignment.center,
crossAxisAlignment: CrossAxisAlignment.center,
children: [
const SizedBox(
height: 44,
),
const Text(
'Calendar',
style: TextStyle(
fontSize: 16,
fontWeight: FontWeight.w500,
fontFamily: 'DM Sans'),
),
const SizedBox(
height: 21,
),
const Text(
'My Class Schedules',
style: TextStyle(
fontSize: 20,
fontWeight: FontWeight.w700,
fontFamily: 'DM Sans'),
),
const SizedBox(
height: 31,
),
],
),)
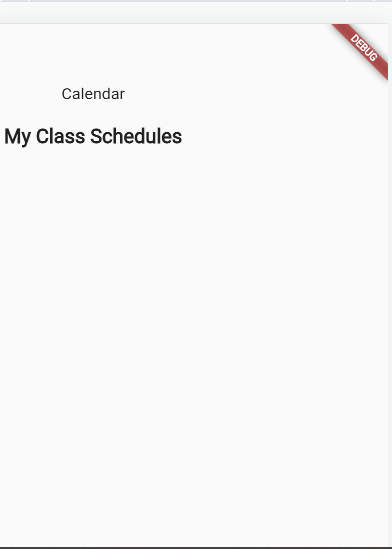
........to be continued
this would give an output of this:
Afterwards, we proceeded to create the pop-up menu containing the months. The pop-up menu widget works as a dropdown, displaying a list of predetermined hardcoded 12 months in their order when clicked, the code goes like this:
child: Column(
crossAxisAlignment: CrossAxisAlignment.center,
children: [
PopupMenuButton<String>(
color: const Color(0xff7D3EE4),
initialValue: selectedMonth,
onSelected: (value) {
setState(() {
selectedMonth = value;
currentMonthIndex = months.indexOf(selectedMonth) + 1;
print(currentMonthIndex);
});
},
itemBuilder: (BuildContext context) {
return months
.map((month) => PopupMenuItem<String>(
value: month,
child: SizedBox(
width: double.infinity,
child: Row(
mainAxisAlignment: MainAxisAlignment.center,
children: [
Text(
month,
style: const TextStyle(
fontSize: 14,
color: Color(0xffffffff),
),
),
const Icon(
Icons.arrow_drop_down,
size: 7.5,
color: Color(0xffffffff),
),
],
),
),
))
.toList();
},
child: Container(
height: 31,
width: 356,
decoration: BoxDecoration(
color: const Color(0xff7D3EE4),
borderRadius: BorderRadius.circular(6),
),
child: Row(
mainAxisAlignment: MainAxisAlignment.center,
children: [
Text(
selectedMonth,
style: const TextStyle(
fontFamily: 'DM Sans',
fontSize: 14,
fontWeight: FontWeight.w400,
color: Color(0xffffffff)),
),
const Icon(
Icons.arrow_drop_up,
color: Color(0xffffffff),
),
]),
),
),
],
),
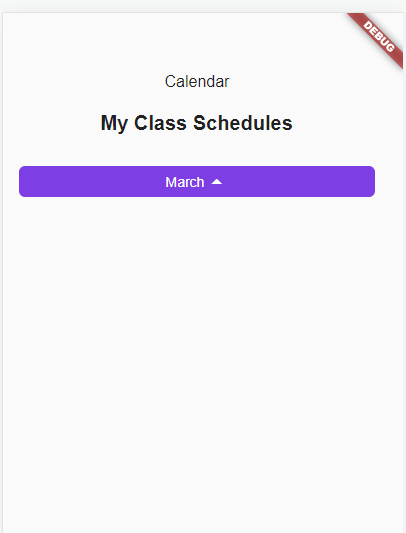
)
the result is as this:
Now to the calendar, A calendar has different days in different months with different start days and different end days but one thing is constant the days of the week and the number of days in a week which we all know as seven, Now what we want the app to do is to as we change the month in the pop-up change to the absolutely correct.
To create the calendar, I first initialized a DateTime variable and a list of string variables for the days of the week. Then, I wrote a function that generates a list of TableRows. The function works by calculating the number of days in a given month based on the first and last days of the month. It then arranges these days in rows of seven, with any days before the first day and after the last day left empty. Finally, I styled the components of the calendar in the UI code to match the design provided.
final DateTime _selectedDate = DateTime.now();
  List<String> weekDays = ['S', 'M', 'T', 'W', 'T', 'F', 'S'];

  List<TableRow> _buildCalendarDays() {
    List<TableRow> rows = [];
    List<DateTime> days = [];
    //now to determine the rows
    DateTime firstDayOfMonth =
        DateTime(_selectedDate.year, currentMonthIndex, 1);
    DateTime lastDayOfMonth =
        DateTime(_selectedDate.year, currentMonthIndex + 1, 0);

    print("Last Day of the Month: $lastDayOfMonth");
    int daysInMonth = lastDayOfMonth.day;
    int dayOfWeek = firstDayOfMonth.weekday;

    int day = 1;

    int rowCount = (lastDayOfMonth.day / 7).ceil() + 1;
    for (int i = 0; i < rowCount; i++) {
      List<Widget> weekDays = List.filled(7, Container());
      for (int j = 0; j < 7; j++) {
        if (day > lastDayOfMonth.day) {
          break;
        } else if (i == 0 && j < firstDayOfMonth.weekday) {
          weekDays[j] = Container();
        } else if (i == (rowCount - 1) && j > lastDayOfMonth.weekday) {
          weekDays[j] = Container();
        } else {
          weekDays[j] = DayBox(
            day: day,
            currentMonthIndex: currentMonthIndex,
            onTap: (day) =>
                print(DateTime(_selectedDate.year, currentMonthIndex, day)),
          );

          day++;
        }
      }
      rows.add(TableRow(children: weekDays));
    }
    return rows;
  }
implementing this in the UI, recall that the function returns a list of TableRow so we create a table widget and implement the weekdays first then the other days
  Table(
           children: [
                      TableRow(
                          children: List.generate(
                        7,
                        (index) => Center(
                          child: Text(
                            weekDays[index],
                            style: const TextStyle(
                                fontFamily: 'DM Sans',
                                fontSize: 12,
                                fontWeight: FontWeight.w700),
                          ),
                        ),
                      )),
                      ..._buildCalendarDays(),
                    ],
                  )
the result
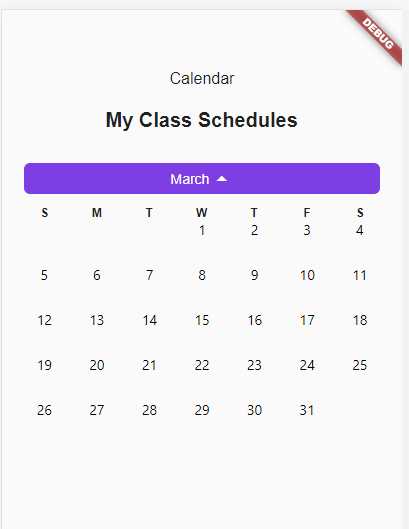
In conclusion, creating this calendar UI was a fun and challenging project that allowed me to improve my skills in Flutter development. I am grateful to my boss for challenging me to take on this task, and I hope this blog post has been helpful to you as a reader. Remember, practice is key to mastering any skill, and with determination, anyone can become a proficient Flutter developer.

